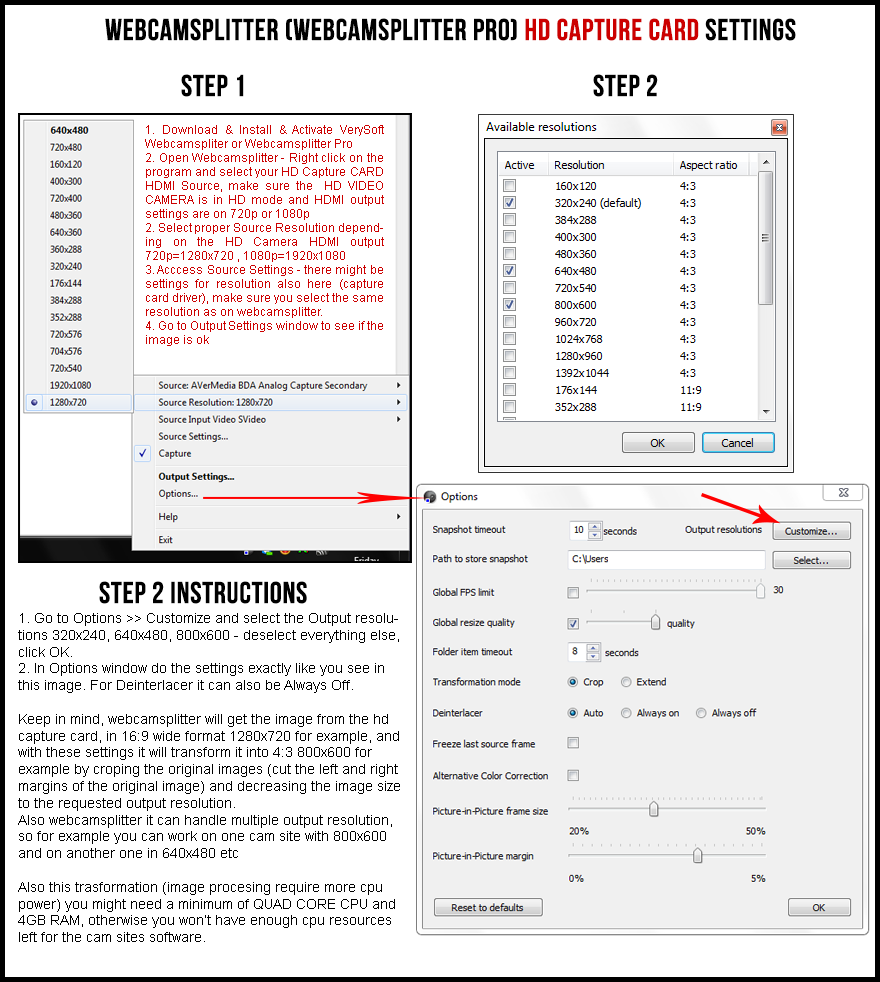
Step 1
1. Download, Install and activate Verysoft Webcamsplitter or Webcamsplitter Pro
2. Open Webcamsplitter and after right click on the program and select your HD Capture CARD HDMI source, make sure the HD video camera is in HD mode and HDMI output settings are on 720p or 1080p
3. Select proper Source Resolution depending on the HD Camera – HDMI output 720p = 1280×720 , 1080p=1920×1080
4. Access Source Settings – there might be settings for resolution also here (capture card driver), make sure you select the same resolution as on webcamsplitter.
5. Go to Output Settings window to see if the image is ok
Step 2
1. Go to Options >> Customize and select the Output resolutions 320×240, 640×480, 800×600 and any other resolution you want to broadcast on – deselect the resolutions you won’t use and click OK
2. In Options window do the settings exactly like you see in the image above.
Keep in mind that Webcamsplitter will get the image from the HD capture card in 16:9 wide format 1280×720 for example and with these settings it will transform it into 4:3 (800×600 for example by cropping the original image (by cutting the left and right margins) and decreasing image size to the requested output resolution. When output and input resolution are the same, of course no transformation occur.
Also Webcamsplitter can handle multiple output resolutions, for example you can work on one cam site with 800×600 or 640×480 (4:3) and on others with 1280×720 (16:9) or other 16:9 resolutions.
This process require more CPU power, depending on how many sites you work on you will need a more powerful computer.